
Every fence is only as good as its foundation. And at the heart of that foundation is the fence post support—the critical piece of hardware that keeps your fence upright and strong against everything from a windy day to the slow, steady march of time.
Getting this choice right from the start is the difference between a fence that lasts for decades and one that starts leaning after just a few seasons, leading to frustrating and expensive repairs.
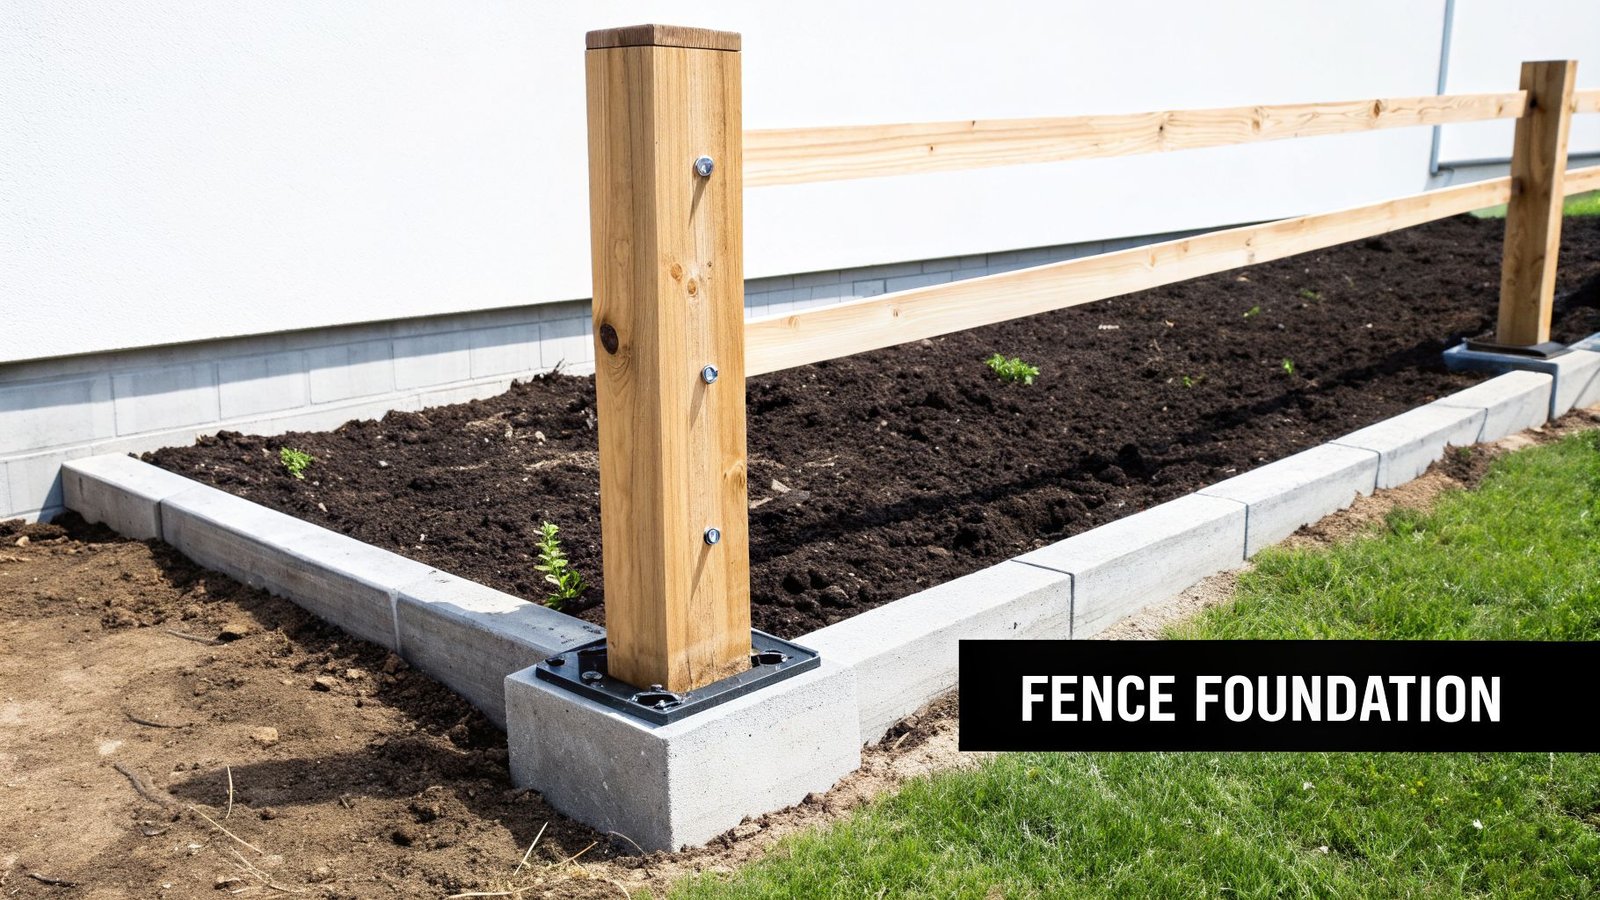
Understanding the Importance of a Strong Foundation
I like to think of fence post supports as the root system of a tree. Just like roots dig deep to keep a massive oak from toppling in a storm, the right support locks your posts in place, giving them the strength to hold up heavy panels and resist whatever the weather throws at them.
Without that solid base, your fence is just waiting for trouble. Shifting soil, frost heave, and high winds will eventually win, leaving you with a structure that sags, leans, and fails. A wobbly fence isn't just an ugly problem—it’s a clear signal that the foundation is giving out.
The main job of a good fence post support is to create an unbreakable bond between the post and the ground. This is why site preparation is so crucial, a point often stressed in guides on building a fence, because it ensures the whole project is built on solid ground.
The Core Methods of Support
While you'll find a ton of different products on the shelf, nearly all of them boil down to three main approaches. Each has its place, and knowing the difference is the first step in picking the right hardware for your specific project, whether it’s a heavy-duty perimeter fence or a simple garden border.
Here are the fundamental methods you’ll encounter:
- Setting Posts in Concrete: This is the old-school, gold-standard method for a reason. It creates a massive, solid footing that gives you the best possible stability, making it perfect for tall, heavy, or high-wind-area fences.
- Using Drive-In Post Spikes: For lighter jobs or temporary fences, spikes are a much faster, less labour-intensive option. They're great when digging big holes isn't practical, like for a small garden fence.
- Mounting on Existing Surfaces: This involves using hardware like post base brackets to securely anchor posts directly onto hard surfaces you already have, like a concrete patio or a wooden deck.
Knowing these core techniques takes you from just buying parts to actually understanding how to build something that lasts. That knowledge is what saves you from the headaches and costs of doing the job twice.
Taking a bit of time to understand your fence post support options is the best investment you can make in your project. It gives you the confidence to know your fence won't just look great when it's done, but will stay a sturdy, reliable part of your property for years to come.
Deciding on Your Fence Post Support Method
When you're staring at a stretch of yard, figuring out how to anchor your fence posts can feel like the biggest hurdle. But it really boils down to three main approaches. There isn't a single "best" way to do it; the right choice depends entirely on your fence, your property, and how much work you want to put in.
Think of it like picking the right foundation for a house. You wouldn't build a skyscraper on the same footing as a garden shed. The support you choose has to match the job—the height and weight of your fence, what it’s made of, and the ground you’re working with.
Let’s walk through the three key methods: the classic concrete footing, quick-and-easy drive-in spikes, and versatile surface-mounted bases. By the time we're done, you'll know exactly which one is right for your project.
To give you a quick overview, here’s a simple comparison of the main support types.
Fence Post Support Types at a Glance
This table breaks down the three primary methods to help you see, at a glance, which one lines up with your project goals.
| Support Type | Best For | Installation Method | Strength & Stability | Ideal Post Material |
|---|---|---|---|---|
| Concrete Footing | Tall, heavy fences; gate posts; permanent boundary lines. | Digging a hole below the frost line and filling with concrete. | Highest. Creates a solid, permanent footing. | Wood, Metal, Vinyl |
| Drive-In Spike | Short, lightweight fences; temporary or decorative applications. | Driving the spike into soft ground with a sledgehammer. | Moderate. Good for light duty, but not for high wind or heavy loads. | Wood (typically 4×4) |
| Surface-Mount Base | Installing posts on existing hard surfaces like concrete, stone, or wood decks. | Bolting the metal base directly onto the surface. | High. Depends on the quality of the base and fasteners used. | Wood, Composite |
Each method has its place. Your job is simply to match the method to the demands of your fence.
The Gold Standard: Setting Posts in Concrete
For generations, the go-to method for a rock-solid fence has been setting the posts directly in concrete. This is the traditional, time-tested technique for a reason. You dig a hole, set your post, and fill the space around it with concrete. It effectively fuses the post to the ground, creating one solid unit that isn't going anywhere.
This is the undisputed champion for a few key scenarios:
- Heavy Fences: If you’re putting up a tall privacy fence, especially one over six feet, it will act like a sail in the wind. Concrete provides the mass and grip needed to keep it standing firm.
- Gate Posts: The constant back-and-forth swing of a gate puts incredible leverage and stress on its posts. A concrete footing is the only way to prevent that inevitable sagging and keep things aligned for years to come.
- Permanent Boundaries: For any fence that needs to be permanent and secure, the stability you get from concrete is simply non-negotiable.
The real secret to making this method last is digging below your local frost line. In a Canadian winter, the moisture in the topsoil freezes and expands, which can literally shove posts right out of the ground. This "frost heave" is the enemy of a straight fence. By setting your concrete base in the stable, unfrozen soil below, you guarantee your fence will stay put, season after season.
Fast and Functional: Drive-In Post Spikes
So, what if you need a fence but don't want the hassle of digging and mixing concrete? That’s where drive-in post spikes come in handy. They’re basically heavy-duty steel spikes with a square socket on top to hold a standard wood post. You just position the spike and drive it straight into the ground with a sledgehammer.
Post spikes are a fantastic solution for lighter jobs where speed is the priority. They’re a favourite for DIY projects because you can set your posts in minutes, not hours.
A post spike is the perfect fence post support for a quick vegetable garden enclosure or a short, decorative border along a walkway. It gives you enough stability for lightweight panels without the mess and cure time of concrete.
You have to be honest about their limitations, though. Spikes just don't have the deep anchoring power of concrete. They're not a good fit for fences over four feet tall or in very loose or sandy soil, where they can start to wobble over time.
The Versatile Solution: Surface-Mount Post Bases
What about when you can't dig at all? If you're building on a concrete patio, a stone landing, or a wood deck, you need a different strategy. This is the perfect job for a surface-mount post base. These are strong metal brackets that you bolt directly to the hard surface, giving you a secure anchor to build from.
This approach opens up a ton of possibilities. You can add a handsome railing to your deck, put up a privacy screen on your patio, or build a pergola without tearing up the existing structure. The trick is using the right fasteners—heavy-duty concrete anchors for a patio, or strong lag bolts into the joists of a deck.
Quality really matters here. A well-made, heavy-gauge steel post base for your needs is engineered to handle serious forces. Historically, this kind of hardware solved a huge problem. In early 20th-century Ontario, for example, farmers found that untreated posts set in the region's clay soils rotted out 30% faster, lasting only about 14 years. Today's surface mounts prevent that entirely by keeping the wood off the ground.
By elevating the end of the post, these bases stop moisture from wicking up from the ground or a concrete slab—the number one cause of rot. This simple design feature can add years to the life of your posts.
How to Select the Right Hardware
Choosing the right hardware for your fence posts isn't a one-size-fits-all game. It's a careful process of matching the gear to the job. The perfect support for a little decorative garden fence will absolutely fail you on a tall privacy fence, so understanding the key variables is your first step to building something that’s safe and built to last.
Think of it like buying tires for your truck. You wouldn't put skinny road tires on a rig you plan to take through muddy backroads. Your fence hardware needs to be just as suited to the load it will carry and the ground it will live on. Let's break down the critical factors you need to nail down.
Fence Material and Weight
First up, you have to consider the sheer weight of your fence. Heavier materials put a constant strain on the entire structure, and that means you need a more robust support system right from the get-go.
- Wood Fences: A solid cedar or pressure-treated pine fence is heavy stuff. On a tall privacy fence, that weight adds up fast, demanding a seriously strong foundation like a concrete footing or a heavy-duty post base bracket to stop it from sagging or leaning.
- Vinyl and Composite Fences: These are lighter than wood, sure, but the panels act like sails in the wind. Your support system has to be tough enough to handle both the weight of the material and the force of a good gust.
- Metal Fences: Lightweight aluminum is one thing, but ornamental iron or steel fences can be incredibly heavy. The weight of these posts and panels pretty much guarantees you’ll need a powerful anchoring method, almost always involving concrete footings or specialized surface mounts.
Soil Type and the Canadian Frost Line
Where you build is just as important as what you build with. The ground under your fence is its ultimate foundation, and its behaviour dictates your best move, especially here in Canada.
Loose, sandy, or loamy soil doesn’t offer much natural grip, meaning posts can start to wobble or shift over time. For these soil types, using concrete is the only way to create a solid, man-made anchor that won’t budge. On the flip side, dense clay soil has more grip but it also holds moisture—and that’s a major risk for frost heave.
Frost heave is a massively destructive force in our climate. When moisture in the soil freezes, it expands with enough power to literally push fence posts right out of the ground. In Canada, digging below your regional frost line—the depth where the ground stays thawed year-round—isn't just a good idea, it's non-negotiable for a stable fence.
This flowchart can help simplify your first big decision based on where you're installing.
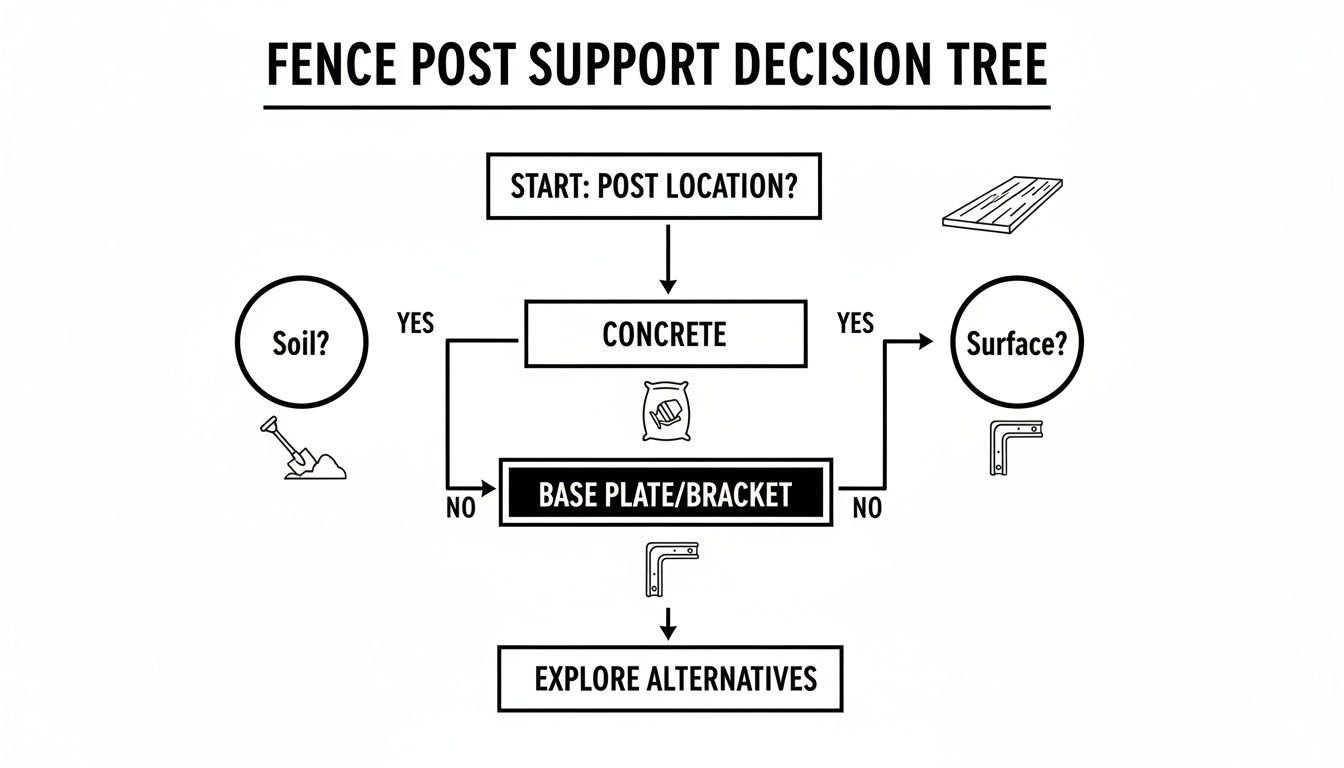
As you can see, if you're working with soil, a concrete footing is the go-to path. But if you’re installing on an existing hard surface, you'll need a sturdy post base.
Fence Height and Wind Load
The height of your fence drastically changes the forces at play. A short, four-foot picket fence barely feels the breeze. But a six or eight-foot privacy fence? That’s a giant sail, catching every bit of force from strong winds.
All that wind creates immense leverage at the base of the post. A support that feels rock-solid on a calm day could easily fail during a storm if it wasn’t sized and secured for the fence's height. As a rule of thumb, any fence over five feet tall needs a deeply anchored support system, like a proper concrete footing or a securely bolted surface mount, to fight back against those forces.
Installation Surface Considerations
Finally, the surface you're anchoring to will point you directly to the right type of hardware. Every surface has its own set of rules and requires a specific tool for the job.
- Bare Ground: This is the classic scenario and usually involves digging holes for concrete footings. It’s your best bet for stability, especially with tall or heavy fences.
- Concrete Surfaces: Got an existing patio, walkway, or slab? A surface-mount post base is what you need. Hardware like our sleeve anchors and wedge anchors are designed to give you the grip needed to securely fasten the base to the concrete. We cover this in-depth in our guide to anchoring posts to a concrete slab.
- Wood Decks: Attaching posts to a deck calls for specialized post bases and fasteners. It’s absolutely critical to bolt these brackets directly to the deck’s structural joists—not just the deck boards—using heavy-duty lag bolts to create a safe connection.
Your Step-by-Step Installation Guide
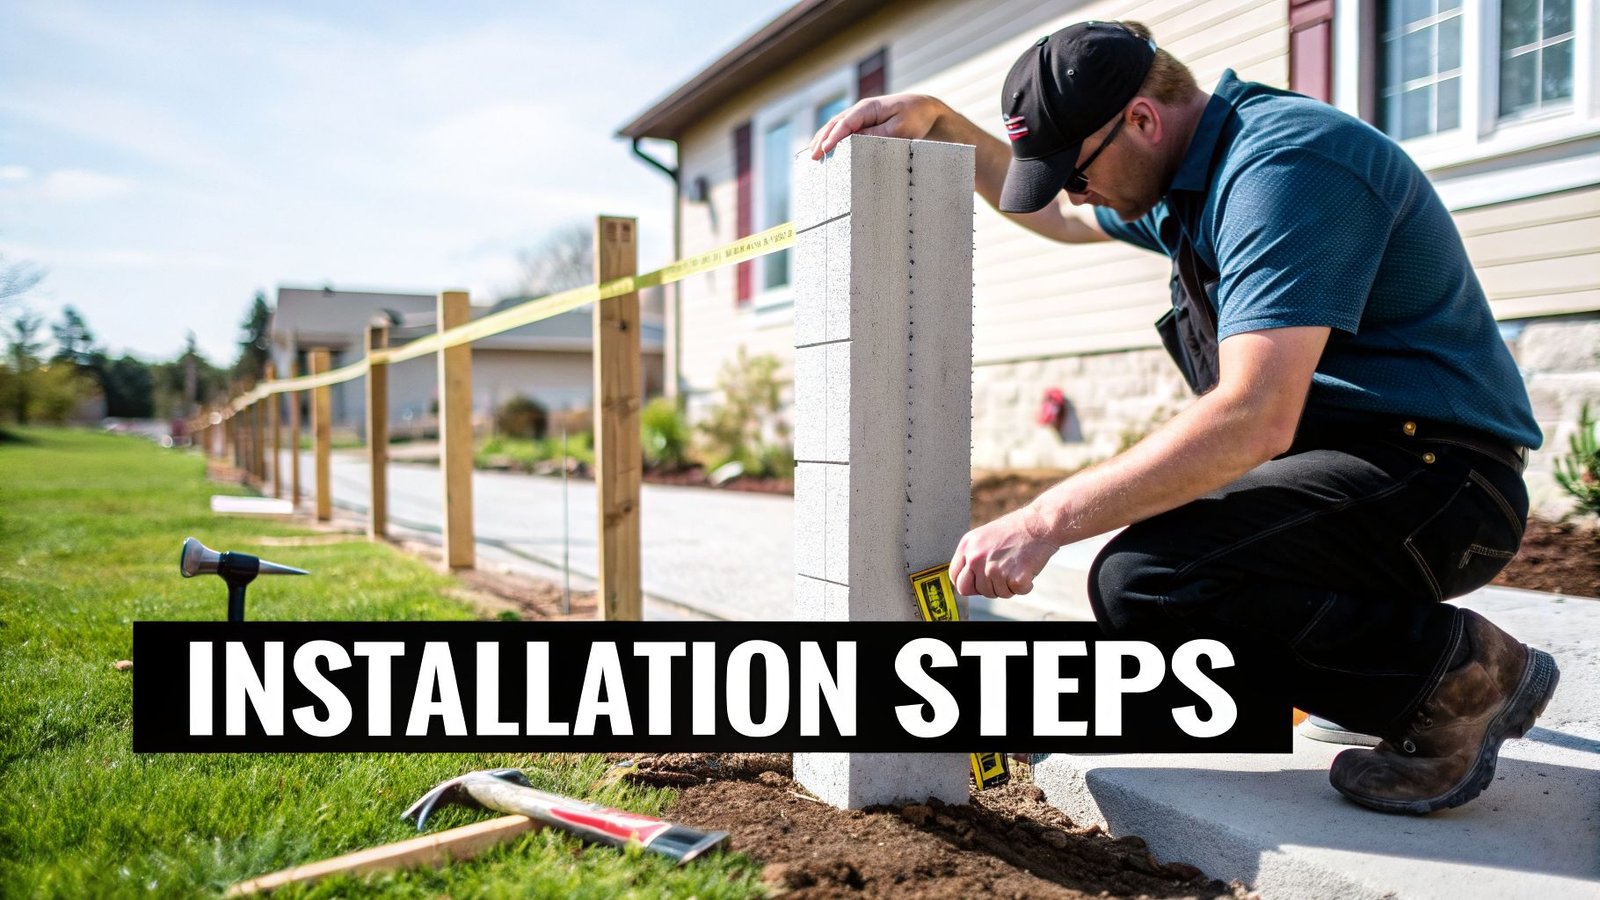
You've picked out the perfect fence post supports, but that's only half the job done. The real test is installing them correctly, because even the best hardware is useless if it isn't properly secured. A weak installation means a weak fence, period.
We’re going to walk through the right way to install the most common types of supports. Think of this as your field guide to building a foundation that lasts.
Preparing Your Site and Layout
A successful fence project starts long before you pick up a shovel. Good preparation is what separates a smooth, professional-looking job from a weekend of frustration.
First things first, map out your fence line with precision. I like to use batter boards and a mason's string pulled tight—it gives you a dead-straight visual guide to keep every post perfectly aligned.
Once your line is set, measure and mark the exact spot for each post hole. Don't eyeball this part. Consistent spacing is what ensures your fence panels and rails will fit without a fight later on.
Safety First: Before a single shovel of dirt is moved, you absolutely must call or check online with your local utility locating service. Hitting a buried gas, water, or electrical line is a dangerous, costly mistake you don't want to make. It’s a free service that marks all underground lines, so you can dig with peace of mind.
Installing Posts with Concrete
When you need uncompromising stability, nothing beats a concrete footing. Yes, it's the most labour-intensive route, but the result is a permanent, rock-solid foundation for your fence that will stand up to anything.
Here’s how to get a perfect concrete pour every time:
- Dig the Hole: Grab a post-hole digger and excavate a hole that's about three times the width of your post. Depth is everything here—you must go below your local frost line, which is typically 3 to 4 feet deep across most of Canada.
- Add Gravel for Drainage: Dump 4 to 6 inches of all-purpose gravel into the bottom of the hole. This creates a simple but effective drainage bed, preventing water from pooling around the post base and causing rot.
- Position and Brace the Post: Place your post in the centre of the hole. Use a level to get it perfectly plumb (that’s perfectly straight, vertically), then lock it in place with temporary 2×4 braces.
- Mix and Pour Concrete: Mix your concrete following the bag's instructions until it’s about the consistency of thick oatmeal. Pour it into the hole, and as you fill it, slope the top surface away from the post so it sheds water.
- Let It Cure: This is the hard part—waiting. Let the concrete cure, completely undisturbed, for at least 24 to 48 hours before you even think about removing the braces or hanging fence panels.
Driving Post Spikes Correctly
For lighter-duty fences, like for a garden or small enclosure, post spikes are a great time-saver. There’s no concrete to mix, but the trick is driving them straight into the ground without bending the spike or knocking it off-kilter.
To do it right, stick a scrap piece of 4×4 post into the spike's socket. This little trick protects the socket from getting mangled by your sledgehammer. Drive the spike into the ground, but stop every few swings to check it with a level. Make small adjustments as you go until the bottom of the socket is flush with the ground.
Installing Surface-Mount Post Bases
Building a fence or railing on an existing concrete patio or wood deck? Surface-mount bases are what you need. A secure installation all comes down to using the right fasteners for the material you’re working with.
- For Concrete Surfaces: Put the post base in position and mark your anchor holes. With a hammer drill and a masonry bit, drill your pilot holes to the specified depth. Fasten the base using high-quality sleeve anchors or concrete screws and tighten them down until that base is absolutely immovable.
- For Wood Decks: This is critical—you have to anchor the base to the deck's underlying structure (the joists), not just the thin deck boards on top. Use heavy-duty lag bolts to get a connection strong enough to safely handle the load of a railing.
No matter which method you choose, the key is to take your time and get the alignment and fastening right. For an even deeper dive into fence building, take a look at our complete guide on how to properly install fence posts.
Preventing Post Rot and Corrosion
A fence is a big investment, and its lifespan is decided right where the posts meet the ground. Even the toughest fence can be brought down by two silent destroyers: moisture that causes rot in wood posts, and the slow creep of corrosion on metal parts. Knowing how to fight these issues is the key to keeping your fence standing strong for years, not just seasons.
Your biggest enemy is constant contact with the ground. Soil is full of moisture and microorganisms that love to eat away at wood, causing decay that weakens a post from the inside out. For all the metal hardware holding things together, that same damp environment is the perfect recipe for rust, which can compromise your entire fence support system.
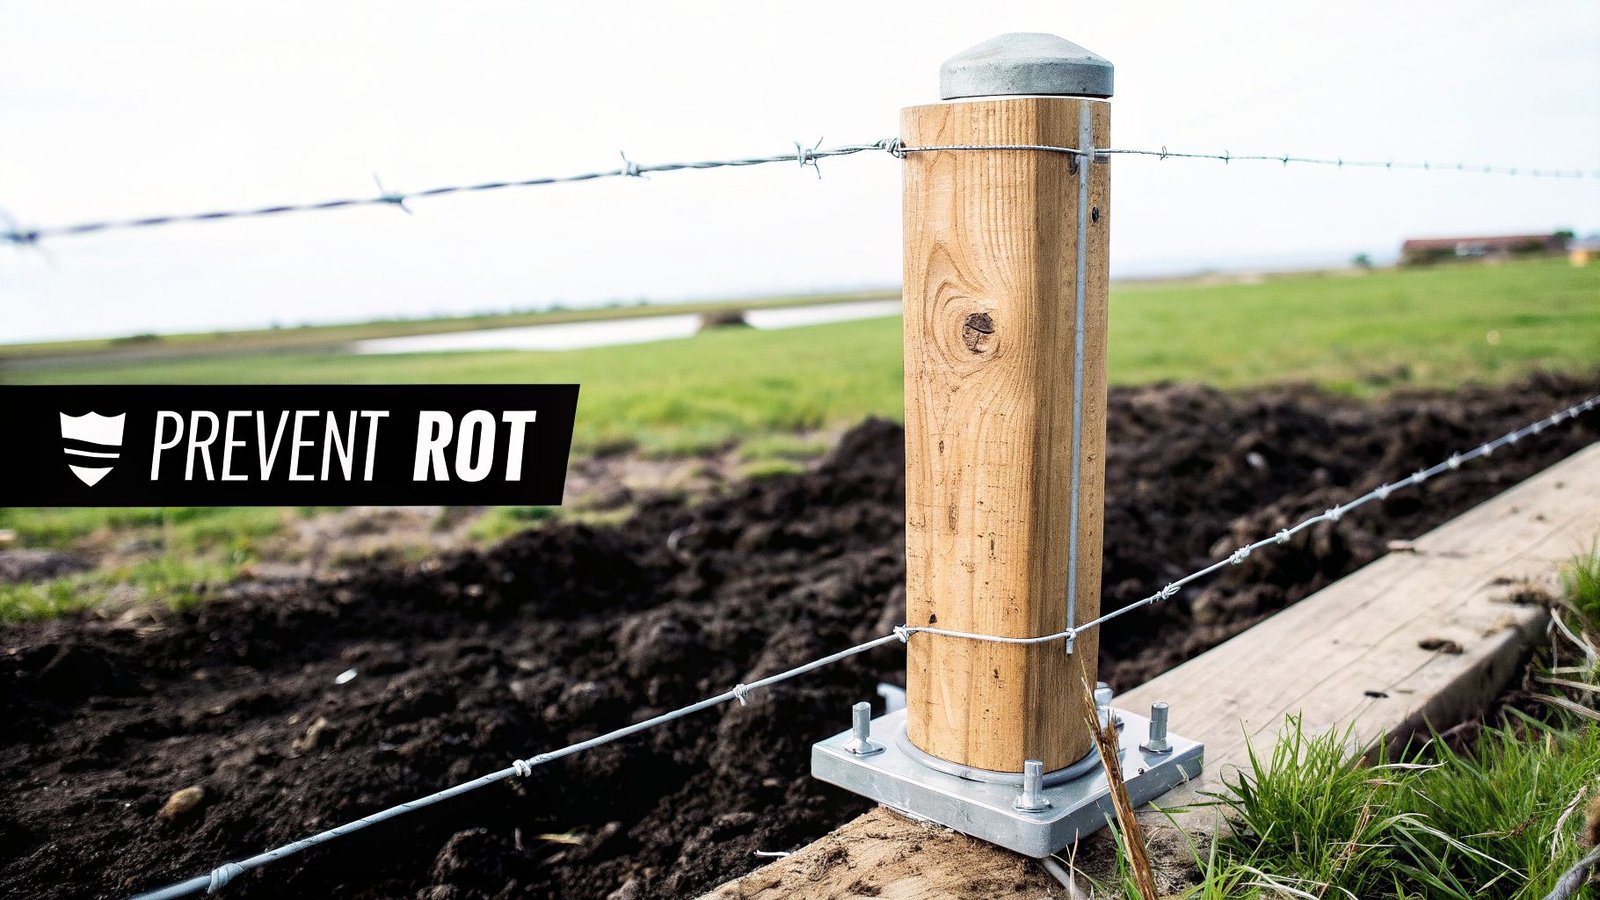
Elevating Posts to Eliminate Rot
The single most effective way to stop post rot is to get the wood away from the moisture. This is exactly what modern fence post support hardware is built to do—lift the wood completely off the ground.
Think of the end of a wood post like a bundle of straws. When it sits in damp soil or even on a concrete pad, it just sucks moisture right up. Using a proper post base, like our bolt-down post bases and post skirts, creates an essential air gap. This keeps the bottom of the post dry and safe from decay.
That simple separation is the most important step you can take to extend the life of your wood posts. It will save you a world of headache and expensive repairs down the line.
Choosing Corrosion-Resistant Hardware
When it comes to the metal parts of your fence, the fight is all about rust. Bare steel doesn't stand a chance against rain, snow, and soil moisture. It will corrode, weakening the very connections that give your fence its strength.
This is why choosing hardware with a protective finish isn't just a good idea—it's non-negotiable. You’ll want to look for one of two industry-standard coatings:
- Galvanized Steel: This process involves coating the steel in a layer of zinc. The zinc acts as a sacrificial barrier, corroding away before the steel underneath is ever touched.
- Powder-Coated Steel: Think of this as an extremely tough, baked-on paint job. A durable powder is applied with an electrostatic charge and then cured with heat, creating a hard shell that seals the metal off from the elements.
There's a reason these materials became the standard. Back in the 1950s, farmers in places like Ontario started shifting to galvanized steel posts. Why? They saw them last 30-50 years without any extra treatment, and over 75 years with proper coatings. That blew the 14-year average lifespan of old wood posts out of the water. It just goes to show the long-term value of corrosion resistance—a feature you'll find on quality hardware like our Xtreme Post and Nuvo Iron product lines. You can read more on the history of fencing materials and their costs.
Sealing the Deal with Post Caps
Don't forget that protection isn't just for the bottom of the post. The exposed top end is just as vulnerable to water. Left open to the elements, it will soak up rain and snow, leading to swelling, cracking, and rot that starts from the top down.
A post cap is a simple and frankly, stylish, solution. Products like the Nuvo Iron post caps we carry slide right over the top of the post, acting like a miniature roof. They block water from getting in and give your fence line a clean, finished look, protecting your investment from top to bottom.
Troubleshooting Common Fence Post Issues
Even the best-built fence can run into trouble down the road. Seeing a post start to lean or wobble isn't just a cosmetic problem—it's a red flag that your fence's foundation is compromised. Getting to the root of the issue is the only way to find a permanent fix and keep your fence standing tall for years to come.
Most of the time, the problem boils down to just a few usual suspects: a shoddy installation job, moisture damage, or the brute force of a Canadian winter. The good news is, if you know what you’re looking for, most of these headaches are entirely fixable.
Tackling a Leaning Post
A leaning post is almost always a sign that the footing was either too shallow to begin with or has weakened over time. If the post itself feels solid but the entire concrete base is tilting, the original hole likely wasn't dug deep enough to brace against the fence's weight.
For posts set directly in soil, the only real long-term fix is to pull the post out, dig a deeper hole, and reset it properly with a new concrete footing. Make sure you brace it until the concrete has fully cured. If the wood has rotted out at the ground level, it's time for a whole new post—and a perfect opportunity to use a quality fence post support that keeps the wood elevated and dry.
A classic mistake is to just kick a leaning post straight and pack more dirt around the base. That's a band-aid solution, at best. If you don't address the core problem—a weak or shallow footing—that post is guaranteed to start leaning again.
What to Do About Wobbly Posts and Frost Heave
A wobbly post might be caused by shifting soil, a cracked footing, or even just loose bolts on a surface-mounted base. If the concrete footing is solid but the wooden post is moving around inside it, you can use repair spikes or specialized epoxies designed to fill that gap and lock the post in place. For surface-mount anchors, the fix can be as simple as tightening the bolts. If the threads are stripped, you'll probably need to drill new holes and upsize your fasteners.
Frost heave is a major headache in our climate, as the freeze-thaw cycle can literally push posts right out of the ground. Honestly, the only way to truly fix this is through prevention—making sure your footings are dug below the local frost line from day one. If a post has already heaved, the only proper solution is to remove it, dig that hole deeper, and reinstall it correctly.
Finally, always be on the lookout for premature rust on any metal hardware or rot on your wood posts. These are clear signs that components are failing. Swapping out worn parts with high-quality, corrosion-resistant hardware doesn't just solve the immediate wobble or lean; it reinforces your entire fence and protects your investment for the long haul.
Your Fence Post Support Questions Answered
Once you've got a plan, a few key questions always pop up right before you start digging. Getting these details sorted out is the difference between a fence that stands tall for decades and one that causes headaches down the road. Let's tackle the most common questions we hear from builders.
How Deep Should My Fence Posts Be?
The old rule of thumb says to bury at least one-third of your post's length. That's a good starting point, but in Canada, the real answer is all about the frost line. You absolutely must dig below it to stop frost heave from slowly pushing your posts right out of the ground each winter.
For a typical 6-foot fence, this usually translates to a hole that’s 3 to 4 feet deep. Before you break out the auger, always give your local municipal office a quick call—they'll tell you the exact depth required for your area. Don't skip this step; it's the most critical part of building a fence that lasts.
Can I Put a Fence Post on an Existing Concrete Patio?
You sure can. This is exactly what surface-mount post bases were designed for. Hardware like the post base brackets you'll find at Xtreme eDeals are engineered to create a rock-solid anchor on hard surfaces like concrete or asphalt.
The process is straightforward: you'll bolt the bracket down to the concrete with sleeve anchors or specialized concrete screws. Then, your wood post slips right into the bracket and gets fastened in place. It's a strong, clean solution for adding a fence or privacy screen without tearing up your existing patio.
This method is perfect for adding privacy screens, railings, or even pergolas to an existing patio. It gives you a secure fence post support system while keeping your beautiful hardscape intact.
What Is the Best Support for a Post on a Wood Deck?
When you're anchoring a post to a wood deck, the game changes slightly. You'll still use a surface-mount post base, but the connection point is everything. Do not just screw it into the deck boards!
For the post to be truly secure, you have to bolt the base directly into the deck's underlying structure—the joists or the blocking between them. Use heavy-duty hardware like lag bolts to make that connection. This ensures the post can handle the leverage from a person leaning on a railing or a strong gust of wind hitting a fence panel.
Is Concrete Always Necessary for Fence Posts?
For most permanent fences, the short answer is yes. If you’re building a privacy fence, a boundary fence, or anything over four feet tall, concrete is your best friend. It creates an incredibly heavy and stable footing that stands up to wind, shifting soil, and the occasional bump from the lawnmower.
While drive-in spikes have their place for very light-duty jobs or temporary fences, they just don't offer the same long-term stability. For a professional-quality fence that you won't have to worry about, concrete is still the gold standard.
Ready to find the perfect hardware for your project? At XTREME EDEALS INC., we offer a wide selection of post bases, anchors, and fasteners to build a fence that lasts. Explore our full collection and start your project with confidence today.


Leave a comment
You must be logged in to post a comment.